

The History and Purpose of Traditional European Wax-Dipped Bench Grafting
- caragardensinfo
- Feb 19
- 6 min read
Long before modern nurseries, grafting machines, and climate-controlled greenhouses, European orchardists developed precise winter grafting techniques to reliably propagate fruit trees. One of the most enduring of these methods is bench grafting with wax dipping, a practice refined over centuries across France, Germany, England, and Central Europe. This method was not born from convenience, but from necessity, biology, and a deep understanding of plant dormancy.
Bench grafting refers to grafting performed indoors on dormant plant material, typically during late winter, before trees are planted out in spring. The wax-dipped variation emerged as a way to protect vulnerable graft unions during this critical period when the plant is alive but not actively growing.
Why Bench Grafting Developed in Europe
European climates posed a challenge for orchard establishment. Winters were cold enough to induce dormancy, but spring conditions were unpredictable. Grafting outdoors exposed fresh unions to drying winds, frost damage, and fluctuating moisture. Orchardists needed a method that allowed grafts to heal under controlled conditions before facing the elements.
Bench grafting solved this by moving the process indoors. Dormant rootstocks and scion wood were brought inside, grafted on a workbench, and then protected until planting time. Wax dipping was introduced as an added layer of insurance.
The Role of Wax in Traditional Grafting
Fresh graft unions are extremely vulnerable. The exposed cambium layer must stay alive long enough to knit together, forming vascular connections between rootstock and scion. Drying out at this stage means failure.
Wax dipping addressed several biological problems at once.
First, wax sealed moisture inside the plant tissues, preventing desiccation of the scion and graft union. Second, it protected against pathogens, acting as a physical barrier during the slow healing phase. Third, wax reduced temperature shock by insulating the graft during storage and early planting.
Traditional grafting waxes were often made from beeswax blended with resins or tallow. These mixtures remained flexible enough not to crack as the plant tissues expanded.
How the Wax-Dipped Bench Grafting Method Works
Dormant rootstock and scion wood are grafted using methods such as whip and tongue or cleft grafts. Once the graft is secured, the upper portion of the grafted tree, including the scion and union, is briefly dipped into warm grafting wax. The wax coats the exposed surfaces and solidifies quickly.
After dipping, grafts are typically stored in cool, humid conditions to encourage callus formation without initiating full growth. Once soil conditions allow, the grafts are planted outdoors, where growth resumes naturally.
Biological Advantages of the Method
Wax-dipped bench grafting works with the plant’s natural physiology rather than forcing rapid growth.
Because the plant is dormant, energy is conserved and redirected toward healing the graft union. The wax prevents moisture loss during this slow phase, allowing cambial cells to divide and form a continuous vascular bridge.
This method also reduces stress on the scion, which has no roots of its own and depends entirely on stored carbohydrates until the graft takes.
Pros of Wax-Dipped Bench Grafting
One of the greatest advantages is high success rates. When done correctly, wax-dipped bench grafting produces consistent unions with minimal loss.
It allows grafting to occur months before planting season, spreading labour over winter rather than compressing it into spring.
The method protects grafts from weather variability, a major factor in graft failure outdoors.
Wax dipping also reduces the need for constant misting or humidity control, making it accessible even before modern greenhouse technology.
Cons and Limitations
Wax dipping requires precise temperature control. Wax that is too hot can damage plant tissues, while wax that is too cool does not seal effectively.
The method is labour intensive compared to modern mechanical grafting systems. Each graft must be handled individually.
Traditional waxes are not breathable, which can trap moisture if applied too thickly. This can encourage rot if storage conditions are poor.
Modern synthetic sealants and parafilm offer more flexibility and breathability, reducing some of these risks.
Comparison to Modern Grafting Approaches
Modern grafting often relies on elastic wraps, parafilm, silicone sealants, or even automated grafting machines. These methods prioritize speed, scalability, and ease of use.
However, many modern approaches assume access to controlled humidity, precise irrigation, and greenhouse infrastructure. Wax-dipped bench grafting was developed in an era without these tools, making it highly resilient and adaptable.
In small scale nurseries, heritage orchards, and conservation work, wax-dipped bench grafting remains valuable because it requires minimal technology while delivering reliable results.
Why the Method Still Matters Today
Wax-dipped bench grafting represents more than a technique. It reflects a philosophy of working with plant dormancy rather than against it. It prioritizes slow healing, moisture balance, and seasonal timing over speed.
For growers interested in heritage fruit trees, rare cultivars, or off-grid propagation, this method remains one of the most biologically sound grafting approaches available.
In an age of rapid production, the continued use of wax-dipped bench grafting is a reminder that many traditional practices endured not because they were old, but because they worked exceptionally well.
HOW TO WAX DIP BENCH GRAFT!
[Introduction]
Bench grafting is performed on fully dormant plant material. Both the rootstock and the scion must be dormant, meaning no active growth, no swelling buds, and firm woody tissue. Dormant wood contains stored carbohydrates that fuel callus formation before leaves emerge.
Scion wood should be collected in late winter or very early spring while fully dormant and stored cool and slightly moist until use. Rootstocks should also be dormant and kept at cool temperatures to prevent premature growth.
Tools and Materials Needed
Successful wax dipping relies on clean, sharp tools and stable materials. You will need a grafting knife or razor sharp blade, grafting wax designed for tree propagation, a heat safe container for melting wax, a thermometer, and a bucket of cool water. Clean labels and a permanent marker are essential to avoid mixing cultivars.
All cutting tools should be sanitized before use to reduce the risk of introducing pathogens into the graft union.
Making the Graft Union
Begin by matching the diameter of the scion and rootstock as closely as possible. Whip and tongue grafts are commonly used because they provide strong mechanical contact and large cambium alignment.
Make clean, smooth cuts. The cambium layers of scion and rootstock must align on at least one side for successful vascular connection. Once aligned, secure the graft firmly by hand. Traditional bench grafting often relied on tight cuts alone, but light tying with grafting tape can add stability.
Preparing the Wax
Grafting wax must be melted slowly and carefully. The ideal wax temperature is typically between 60°C and 70°C. Wax that is too hot can damage cambial tissue, while wax that is too cool will not coat evenly.
Use a thermometer and never guess the temperature. Melt the wax gently using indirect heat. Stir occasionally to maintain uniform temperature. If the wax is smoking, or if you touch the wax and it's hot. It's too hot.
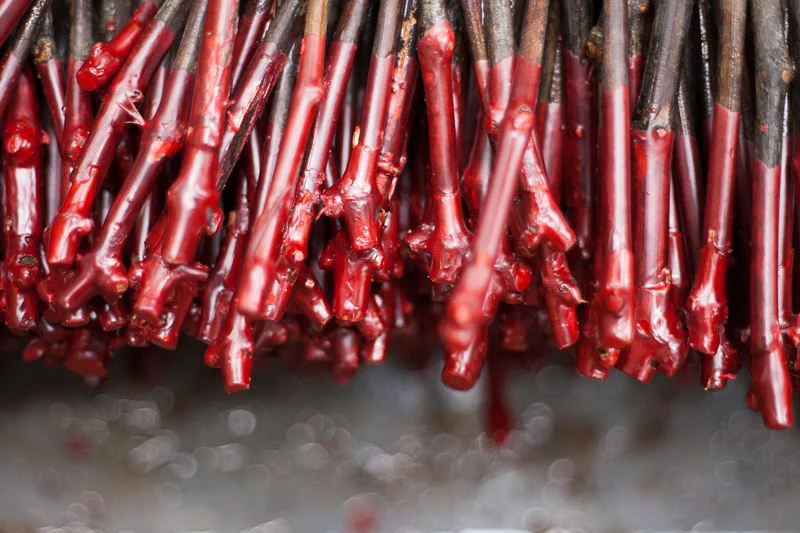
The Wax Dipping Technique
Hold the grafted plant by the rootstock and dip the upper portion into the wax. The wax should cover the graft union and the scion wood, including all exposed cuts. Avoid dipping the roots.
The dip should be quick and smooth, usually lasting no more than one to two seconds. Immediately after dipping, the wax will solidify. If the coating appears uneven or cracked, adjust the wax temperature slightly and repeat with another graft.
Some growers briefly dip the waxed portion into cool water to set the coating faster, but this is optional if ambient temperatures are moderate.
Post Dipping Inspection
Once cooled, inspect the wax layer. It should form a smooth, continuous seal without bubbles or gaps. The coating should not be excessively thick, as this can trap moisture and encourage decay.
Label each graft immediately. Waxed grafts can look very similar once sealed, making misidentification easy.
Creating the Right Healing Environment
After wax dipping, grafts must be held in conditions that promote callus formation without forcing top growth.
The ideal environment is cool and humid. Temperatures between 2°C and 7°C are optimal during the initial healing phase. High humidity prevents desiccation, while cool temperatures keep the plant dormant.
Grafts can be stored upright in moist sawdust, wood shavings, or peat substitute. The medium should be slightly damp, not wet. Excess moisture encourages fungal growth.
Air circulation is important. Stagnant air combined with high humidity can cause mold.
Callus Formation Phase
Callus tissue forms slowly at the graft union as cambial cells divide. This process can take several weeks. During this time, the plant should remain dormant.
Avoid warm temperatures during this phase. Warmth encourages bud break before the graft union is fully healed, increasing the risk of failure.
Transition to Growth
Once outdoor conditions are suitable for planting, grafts can be moved gradually into warmer temperatures. This transition should be slow to prevent shock.
If planting into pots, place them in a cool, protected area with indirect light until buds begin to swell. Outdoor planting should occur when soil can be worked and extreme cold has passed.
Maintaining Success Year Round
For those wishing to bench graft outside of the traditional season, temperature control becomes essential. Dormancy must be maintained artificially by cold storage until grafting. Callusing can be managed in controlled cool rooms or unheated spaces that stay above freezing.
The key principle is consistency. Dormant plants, stable temperatures, controlled humidity, and careful wax application create repeatable success regardless of calendar date.
Common Mistakes to Avoid
Using non dormant wood is one of the most common causes of failure. So is overheating wax or allowing grafts to dry out before sealing.
Rushing the healing phase or forcing growth too early leads to weak unions.
Patience and attention to biological timing are more important than speed.


Comments